Tutorial (ASP.NET Core)
Note:
This tutorial is for Visual Studio 2019 and ASP.NET Core MVC. If you're still using ASP.NET 4 and ASP.NET MVC 5, you can follow the ASP.NET 4 tutorial instead
Quick start #
dotnet new -i React.Template
dotnet new reactnet-vanilla
dotnet run
Heads up! This configuration only supports globally-scoped modules. If you're planning on using require or import module syntax in your application, use the reactnet-webpack template instead for webpack support. #
Step by step version #
This tutorial covers the end-to-end process of creating a brand new ASP.NET MVC website and adding a React component in it. We will start from scratch and end with a fully functioning component. It assumes you have basic knowledge of ASP.NET MVC and using Visual Studio. This tutorial is based off the original React tutorial but has been modified specifically for ReactJS.NET.
We'll be building a simple, but realistic comments box that you can drop into a blog, a basic version of the realtime comments offered by Disqus, LiveFyre or Facebook comments.
We'll provide:
- A view of all of the comments
- A form to submit a comment
- Simple server-side in-memory storage for comments
It'll also have a few neat features:
- Optimistic commenting: comments appear in the list before they're saved on the server so it feels fast.
- Live updates: other users' comments are popped into the comment view in real time.
- Markdown formatting: users can use Markdown to format their text.
Want to skip all this and see the source? #
Getting started #
For this tutorial we'll be using Visual Studio 2019. If you do not already have a copy of Visual Studio, the Community version is free. We will be using ASP.NET Core MVC.
New Project #
Start by creating a new ASP.NET Core MVC project:
- File → New → Project...
- Select "ASP.NET Core Web Application". You may search for it via the search box or narrow down your choices via the drop-downs - C#, All platforms, Web is a good way to get it as the first result.
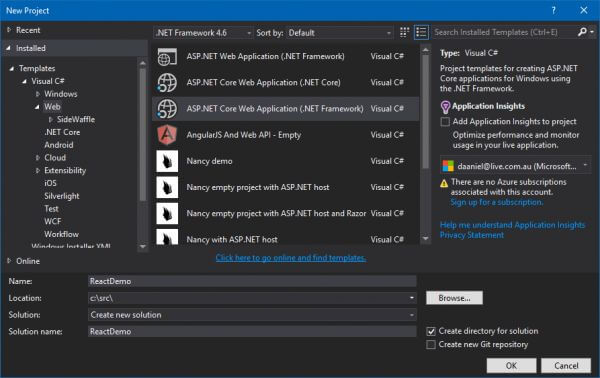
- Click "Next".
- Enter "ReactDemo" for the project name and location to store it.
- Click "Create".
- In the "Create a new ASP.NET Core web application" dialog, select the "Web Application (Model-View-Controller)" template. Also, ensure "Change Authentication" is set to "No Authentication".

- Click "Create".
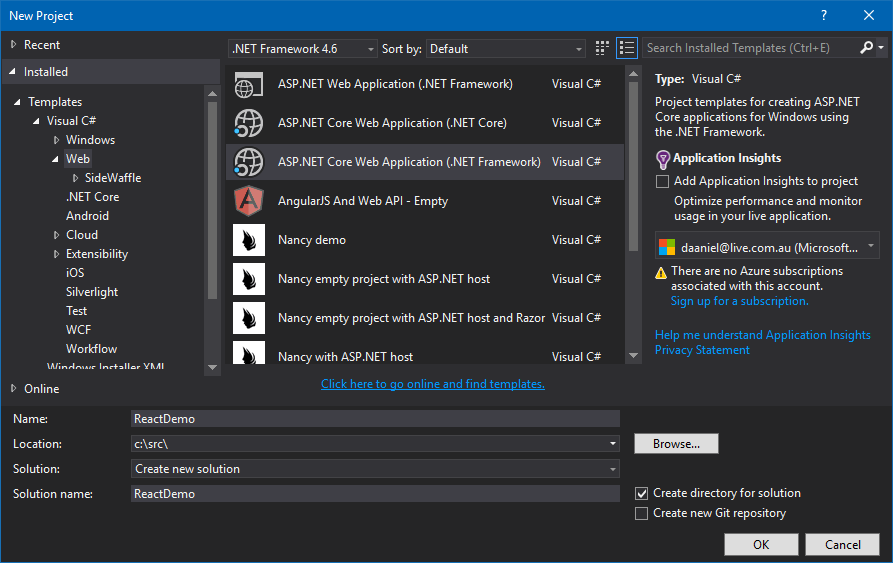

Note: We are using .NET Core 3.1 in this tutorial.
Remove example content #
The default Web Application template includes some example content that we don't need. Delete the following files:
-
Controllers\HomeController.cs -
Views\HomeandViews\Sharedfolders
Install ReactJS.NET #
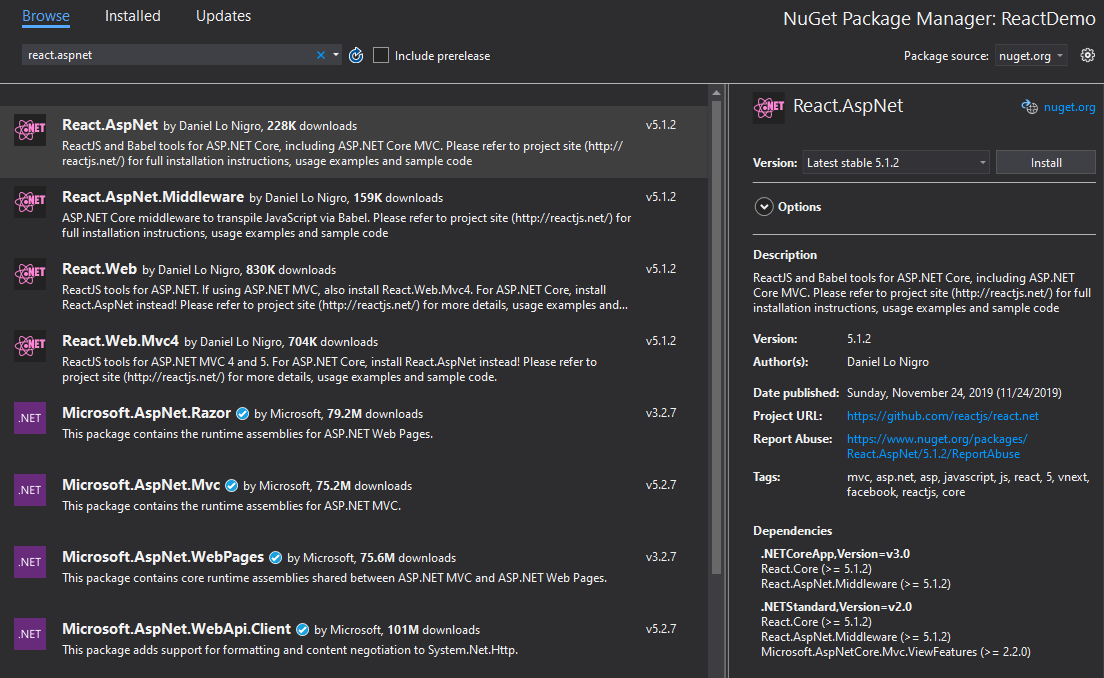
We need to install ReactJS.NET to the newly-created project. This is accomplished using NuGet, a package manager for .NET. Right-click on the "ReactDemo" project in the Solution Explorer and select "Manage NuGet Packages...". Click the "Browse" tab, search for "React.AspNet", and install the React.AspNet package.
Install a JS engine #
While we're managing NuGet packages, we need to install a JS engine. Search for and install one of either:
-
JavaScriptEngineSwitcher.V8(what this tutorial uses) -
JavaScriptEngineSwitcher.ChakraCore
If you choose ChakraCore, make sure you change any code/using statements in this tutorial where needed.
Now, install the native assembly based on your architecture and engine choice:
V8:
-
JavaScriptEngineSwitcher.V8.Native.win-x86 -
JavaScriptEngineSwitcher.V8.Native.win-x64(what this tutorial uses)
Chakra:
-
JavaScriptEngineSwitcher.ChakraCore.Native.win-x86 -
JavaScriptEngineSwitcher.ChakraCore.Native.win-x64 -
JavaScriptEngineSwitcher.ChakraCore.Native.win-arm -
JavaScriptEngineSwitcher.ChakraCore.Native.linux-x64 -
JavaScriptEngineSwitcher.ChakraCore.Native.osx-x64
Lastly, install JavaScriptEngineSwitcher.Extensions.MsDependencyInjection.
Modify Startup.cs #
We also need to modify the Startup.cs file to initialize ReactJS.NET. You can learn more about this on the Getting Started on ASP.NET Core page. Open Startup.cs and perform the following changes:
At the top of the file, add:
using Microsoft.AspNetCore.Http;
using JavaScriptEngineSwitcher.V8;
using JavaScriptEngineSwitcher.Extensions.MsDependencyInjection;
using React.AspNet;
Directly above:
services.AddControllersWithViews();
Add:
services.AddSingleton<IHttpContextAccessor, HttpContextAccessor>();
services.AddReact();

// Make sure a JS engine is registered, or you will get an error!
services.AddJsEngineSwitcher(options => options.DefaultEngineName = V8JsEngine.EngineName)
  .AddV8();
Directly above:
app.UseStaticFiles();
Add:
// Initialise ReactJS.NET. Must be before static files.
app.UseReact(config =>
{
  // If you want to use server-side rendering of React components,
  // add all the necessary JavaScript files here. This includes
  // your components as well as all of their dependencies.
  // See http://reactjs.net/ for more information. Example:
  //config
  //  .AddScript("~/js/First.jsx")
  //  .AddScript("~/js/Second.jsx");

  // If you use an external build too (for example, Babel, Webpack,
  // Browserify or Gulp), you can improve performance by disabling
  // ReactJS.NET's version of Babel and loading the pre-transpiled
  // scripts. Example:
  //config
  //  .SetLoadBabel(false)
  //  .AddScriptWithoutTransform("~/js/bundle.server.js");
});
Finally, add this to the top of Views\_ViewImports.cshtml:
@using React.AspNet
Create basic controller and view #
Since this tutorial focuses mainly on ReactJS.NET itself, we will not cover creation of an MVC controller in much detail. To learn more about ASP.NET MVC, refer to its official website.
- Right-click on the Controllers folder and select Add → New Item...
- Select ASP.NET Core → Controller Class
- Name the file
HomeController.cs - Click "Add"
Once the controller has been created, we also need to create a view
- Right-click on the Views folder, select Add → New Folder, and create a "Home" folder
- Right-click on the Views\Home folder and select Add → View...
- Name the view file
Index - Click "Add"
Replace the contents of the new view file with the following:
@{
    Layout = null;
}
<html>
<head>
  <title>Hello React</title>
</head>
<body>
    <div id="content"></div>
    <script crossorigin src="https://cdnjs.cloudflare.com/ajax/libs/react/16.13.0/umd/react.development.js"></script>
    <script crossorigin src="https://cdnjs.cloudflare.com/ajax/libs/react-dom/16.13.0/umd/react-dom.development.js"></script>
    <script src="https://cdnjs.cloudflare.com/ajax/libs/remarkable/1.7.1/remarkable.min.js"></script>
<script src="@Url.Content("~/js/Tutorial.jsx")"></script>
</body>
</html>
Note: In a real ASP.NET MVC site, you'd use a layout. However, to keep this tutorial simple, we will keep all HTML in the one view file.
We also need to create the referenced JavaScript file (tutorial.jsx). Right-click on wwwroot\js and select Add → New Item. Select ASP.NET Core → Web → Scripts → JavaScript File, enter "tutorial.jsx" as the file name, and click "Add".
For the remainder of this tutorial, we'll be writing our JavaScript code in this file.
Your first component #
React is all about modular, composable components. For our comment box example, we'll have the following component structure:
- CommentBox
  - CommentList
    - Comment
  - CommentForm
Let's build the CommentBox component, which displays a simple <div>. Add this code to Tutorial.jsx:
class CommentBox extends React.Component {
    render() {
        return (
            <div className="commentBox">Hello, world! I am a CommentBox.</div>
        );
    }
}

ReactDOM.render(<CommentBox />, document.getElementById('content'));
Note that native HTML element names start with a lowercase letter, while custom React class names begin with an uppercase letter.
At this point, run your application by clicking the "Play" button in Visual Studio. If successful, your default browser should start and you should see "Hello, world! I am a CommentBox."
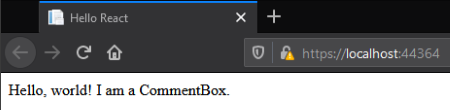
If you see this, congratulations! You've just built your first React component. You can leave the application running while you continue this tutorial. Simply change the JSX file and refresh to see your changes.
JSX Syntax #
The first thing you'll notice is the XML-ish syntax in your JavaScript. We have a simple precompiler that translates the syntactic sugar to this plain JavaScript:
class CommentBox extends React.Component {
    render() {
        return React.createElement(
            'div',
            { className: 'commentBox' },
            'Hello, world! I am a CommentBox.',
        );
    }
}

ReactDOM.render(
    React.createElement(CommentBox, null),
    document.getElementById('content'),
);
Its use is optional but we've found JSX syntax easier to use than plain JavaScript. Read more in React's "JSX In Depth" article.
What's going on #
We are defining a new JavaScript class that extends from the React.Component class. In our class, we will define some properties and some methods to build from what React.Component already gives us. The most important of these methods is called render which returns a tree of React components that will eventually render to HTML.
The <div> tags are not actual DOM nodes; they are instantiations of React div components. You can think of these as markers or pieces of data that React knows how to handle. React is safe. We are not generating HTML strings so XSS protection is the default.
You do not have to return basic HTML. You can return a tree of components that you (or someone else) built. This is what makes React composable: a key tenet of maintainable frontends.
ReactDOM.render() instantiates the root component, starts the framework, and injects the markup into a raw DOM element, provided as the second argument.
The ReactDOM module exposes DOM-specific methods, while React has the core tools shared by React on different platforms (e.g., React Native).
Composing components #
Let's build skeletons for CommentList and CommentForm which will, again, be simple <div>s. Add these two components to your file, keeping the existing CommentBox declaration and ReactDOM.render call:
class CommentList extends React.Component {
    render() {
        return (
            <div className="commentList">Hello, world! I am a CommentList.</div>
        );
    }
}

class CommentForm extends React.Component {
    render() {
        return (
            <div className="commentForm">Hello, world! I am a CommentForm.</div>
        );
    }
}
Next, update the CommentBox component to use these new components:
class CommentBox extends React.Component {
    render() {
        return (
            <div className="commentBox">
                <h1>Comments</h1>
                <CommentList />
                <CommentForm />
            </div>
        );
    }
}
Notice how we're mixing HTML tags and components we've built. HTML tags are React components just like the ones you define, but they have one difference. The JSX compiler will automatically rewrite HTML tags to React.createElement(tagName) expressions and leave everything else alone. This is to prevent the pollution of the global namespace.
Using props #
Let's create the Comment component, which will depend on data passed in from our CommentList component. Data passed in from the CommentList component is available as a 'property' on our Comment component. These 'properties' are accessed through this.props. Using props, we will be able to read the data passed to the Comment from the CommentList, and render some markup:
class Comment extends React.Component {
    render() {
        return (
            <div className="comment">
                <h2 className="commentAuthor">{this.props.author}</h2>
                {this.props.children}
            </div>
        );
    }
}
By surrounding a JavaScript expression with braces inside JSX (as either an attribute or child), you can drop text or React components into the tree. We access named attributes passed to the component as keys on this.props and any nested elements as this.props.children.
Component Properties #
Now that we have defined the Comment component, we will want to pass it the author name and comment text. This allows us to reuse the same code for each unique comment. Now let's add some comments within our CommentList:
class CommentList extends React.Component {
    render() {
        return (
            <div className="commentList">
                <Comment author="Daniel Lo Nigro">
                    Hello ReactJS.NET World!
                </Comment>
                <Comment author="Pete Hunt">This is one comment</Comment>
                <Comment author="Jordan Walke">
                    This is *another* comment
                </Comment>
            </div>
        );
    }
}
Note that we have passed some data from the parent CommentList component to the child Comment components. For example, we passed Daniel Lo Nigro (via the author attribute) and Hello ReactJS.NET World (via an XML-like child node) to the first Comment. As noted above, the Comment component will access these 'properties' through this.props.author, and this.props.children.
Adding Markdown #
Markdown is a simple way to format your text inline. For example, surrounding text with asterisks will make it emphasized.
In this tutorial we use a third-party library called remarkable which takes Markdown text and converts it to raw HTML. We already included this library with the original markup for the page, so we can start using it right away. Let's convert the comment text to Markdown and output it:
function createRemarkable() {
    var remarkable =
        'undefined' != typeof global && global.Remarkable
            ? global.Remarkable
            : window.Remarkable;

    return new remarkable();
}

class Comment extends React.Component {
    render() {
        const md = createRemarkable();
        return (
            <div className="comment">
                <h2 className="commentAuthor">{this.props.author}</h2>
                {md.render(this.props.children.toString())}
            </div>
        );
    }
}
All we're doing here is finding and calling the remarkable library. We need to convert this.props.children from React's wrapped text to a raw string that remarkable will understand so we explicitly call toString().
But there's a problem! Our rendered comments look like this in the browser: "<p>This is <em>another</em> comment</p>". We want those tags to actually render as HTML.
That's React protecting you from an XSS attack. There's a way to get around it but the framework warns you not to use it:
class Comment extends React.Component {
    rawMarkup() {
        const md = new Remarkable();
        const rawMarkup = md.render(this.props.children.toString());
        return { __html: rawMarkup };
    }
    render() {
        return (
            <div className="comment">
                <h2 className="commentAuthor">{this.props.author}</h2>
                <span dangerouslySetInnerHTML={this.rawMarkup()} />
            </div>
        );
    }
}
This is a special API that intentionally makes it difficult to insert raw HTML, but for remarkable we'll take advantage of this backdoor.
Remember: by using this feature you're relying on remarkable to be secure. In this case, remarkable automatically strips HTML markup and insecure links from the output.
Hook up the data model #
So far we've been inserting the comments directly in the source code. Instead, let's render a blob of JSON data into the comment list. Eventually this will come from the server, but for now, write it in your source:
const data = [
    { id: 1, author: 'Daniel Lo Nigro', text: 'Hello ReactJS.NET World!' },
    { id: 2, author: 'Pete Hunt', text: 'This is one comment' },
    { id: 3, author: 'Jordan Walke', text: 'This is *another* comment' },
];
We need to get this data into CommentList in a modular way. Modify CommentBox and the ReactDOM.render() call to pass this data into the CommentList via props:
class CommentBox extends React.Component {
    render() {
        return (
            <div className="commentBox">
                <h1>Comments</h1>
                <CommentList data={this.props.data} />
                <CommentForm />
            </div>
        );
    }
}

ReactDOM.render(<CommentBox data={data} />, document.getElementById('content'));
Now that the data is available in the CommentList, let's render the comments dynamically:
class CommentList extends React.Component {
    render() {
        const commentNodes = this.props.data.map(comment => (
            <Comment author={comment.author} key={comment.id}>
                {comment.text}
            </Comment>
        ));
        return <div className="commentList">{commentNodes}</div>;
    }
}
That's it!
Server-side Data #
Let's return some data from the server. If you are still debugging, end it by pressing the Stop button. To do so, we need to first create a C# class to represent our comments. You should have a "Models" folder, but if not, right-click on ReactDemo and select Add → New Folder and name the folder "Models". Once the models folder exists, right click on it, select Add → Class..., and enter "CommentModel.cs" as the file name. We'll create a basic comment model:
namespace ReactDemo.Models
{
    public class CommentModel
    {
        public int Id { get; set; }
        public string Author { get; set; }
        public string Text { get; set; }
    }
}
In a real application, you'd use the repository pattern here, and retrieve the comments from a database. For simplicity, we'll modify our controller to have a hard-coded list of comments.
using System.Collections.Generic;
using Microsoft.AspNetCore.Mvc;
using ReactDemo.Models;

namespace ReactDemo.Controllers
{
    public class HomeController : Controller
    {
        private static readonly IList<CommentModel> _comments;

        static HomeController()
        {
            _comments = new List<CommentModel>
            {
                new CommentModel
                {
                    Id = 1,
                    Author = "Daniel Lo Nigro",
                    Text = "Hello ReactJS.NET World!"
                },
                new CommentModel
                {
                    Id = 2,
                    Author = "Pete Hunt",
                    Text = "This is one comment"
                },
                new CommentModel
                {
                    Id = 3,
                    Author = "Jordan Walke",
                    Text = "This is *another* comment"
                },
            };
        }

        public ActionResult Index()
        {
            return View();
        }
    }
}
Let's also add a new controller action to return the list of comments:
[Route("comments")]
[ResponseCache(Location = ResponseCacheLocation.None, NoStore = true)]
public ActionResult Comments()
{
    return Json(_comments);
}
The Route attribute specifies that this action should be used when /comments is loaded. This method of defining URL routes is known as "attribute routing".
The ResponseCache attribute is used here to prevent browsers from caching the response. When designing a real world API, caching of API requests should be considered more carefully. For this tutorial it is easiest to simply disable caching.
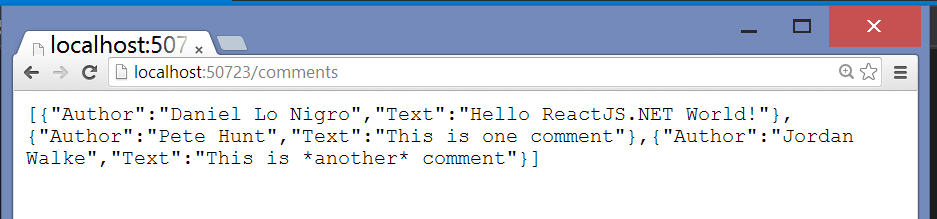
Let's restart debugging (press the play button) and hit /comments in your browser, you should now see the data encoded as JSON:
Fetching from the server #
Now that we have a data source, we can replace the hard-coded data with the dynamic data from the server. We will remove the data prop and replace it with a URL to fetch:
ReactDOM.render(
    <CommentBox url="/comments" />,
    document.getElementById('content')
);
Note that in a real app, you should generate the URL server-side (via Url.Action call) and pass it down, or use RouteJs rather than hard-coding it. This tutorial hard-codes it for simplicity.
This component is different from the prior components because it will have to re-render itself. The component won't have any data until the request from the server comes back, at which point the component may need to render some new comments.
Reactive state #
So far, based on its props, each component has rendered itself once. props are immutable: they are passed from the parent and are "owned" by the parent. To implement interactions, we introduce mutable state to the component. this.state is private to the component and can be changed by calling this.setState() and passing an object that represents changes in state. When the state updates, the component re-renders itself.
render() methods are written declaratively as functions of this.props and this.state. The framework guarantees the UI is always consistent with the inputs.
When the server fetches data, we will be changing the comment data we have. Let's add an array of comment data to the CommentBox component as its state:
class CommentBox extends React.Component {
    constructor(props) {
        super(props);
        this.state = { data: [] };
    }
    render() {
        return (
            <div className="commentBox">
                <h1>Comments</h1>
                <CommentList data={this.state.data} />
                <CommentForm />
            </div>
        );
    }
}
The constructor() executes exactly once during the lifecycle of the component and sets up the initial state of the component. Remember to call the super class (the class we're extending, React.Component) via super(props) before using the this keyword.
Updating state #
When the component is first created, we want to GET some JSON from the server and update the state to reflect the latest data. We'll use the standard XMLHttpRequest API to retrieve the data. If you need support for old browsers (mainly old Internet Explorer), you can use an AJAX library or a multipurpose library such as jQuery. componentWillMount() executes immediately and only once before the rendering occurs. In the following example, componentWillMount() loads the data from our XMLHttpRequest and assigns it to the data variable. Finally, it sets the data variable in state, using setState().
class CommentBox extends React.Component {
    constructor(props) {
        super(props);
        this.state = { data: [] };
    }
    componentWillMount() {
        const xhr = new XMLHttpRequest();
        xhr.open('get', this.props.url, true);
        xhr.onload = () => {
            const data = JSON.parse(xhr.responseText);
            this.setState({ data: data });
        };
        xhr.send();
    }
    render() {
        return (
            <div className="commentBox">
                <h1>Comments</h1>
                <CommentList data={this.state.data} />
                <CommentForm />
            </div>
        );
    }
}
Below, we're using componentDidMount(), a method called automatically by React after a component is rendered for the first time. By moving the XMLHttpRequest call from componentWillMount(), which is executed only once before rendering, to a function called loadCommentsFromServer(), we can then call it multiple times from componentDidMount() at a set interval to check for any updates to the comments.
The key to these dynamic updates is the call to this.setState(). We replace the old array of comments with the new one from the server and the UI automatically updates itself. Because of this reactivity, it is only a minor change to add live updates. We will use simple polling here but you could easily use SignalR or other technologies.
class CommentBox extends React.Component {
    constructor(props) {
        super(props);
        this.state = { data: [] };
    }
    loadCommentsFromServer() {
        const xhr = new XMLHttpRequest();
        xhr.open('get', this.props.url, true);
        xhr.onload = () => {
            const data = JSON.parse(xhr.responseText);
            this.setState({ data: data });
        };
        xhr.send();
    }
    componentDidMount() {
        this.loadCommentsFromServer();
        window.setInterval(
            () => this.loadCommentsFromServer(),
            this.props.pollInterval,
        );
    }
    render() {
        return (
            <div className="commentBox">
                <h1>Comments</h1>
                <CommentList data={this.state.data} />
                <CommentForm />
            </div>
        );
    }
}

ReactDOM.render(
    <CommentBox url="/comments" pollInterval={2000} />,
    document.getElementById('content'),
);
All we have done here is move the AJAX call to a separate method and call it when the component is first loaded and every 2 seconds after that.
Adding new comments #
To accept new comments, we need to first add a controller action to handle it. This will be some simple C# code that appends the new comment to the static list of comments:
[Route("comments/new")]
[HttpPost]
public ActionResult AddComment(CommentModel comment)
{
    // Create a fake ID for this comment
    comment.Id = _comments.Count + 1;
    _comments.Add(comment);
    return Content("Success :)");
}
The Form #
Now it's time to build the form. Our CommentForm component should ask the user for their name and comment text and send a request to the server to save the comment.
class CommentForm extends React.Component {
    render() {
        return (
            <form className="commentForm">
                <input type="text" placeholder="Your name" />
                <input type="text" placeholder="Say something..." />
                <input type="submit" value="Post" />
            </form>
        );
    }
}
Controlled components #
With the traditional DOM, input elements are rendered and the browser manages the state (its rendered value). As a result, the state of the actual DOM will differ from that of the component. This is not ideal as the state of the view will differ from that of the component. In React, components should always represent the state of the view and not only at the point of initialization.
Hence, we will be using this.state to save the user's input as it is entered. We define an initial state with two properties author and text and set them to be empty strings. In our <input> elements, we set the value prop to reflect the state of the component and attach onChange handlers to them. These <input> elements with a value set are called controlled components. Read more about controlled components on the Forms article.
class CommentForm extends React.Component {
    constructor(props) {
        super(props);
        this.state = { author: '', text: '' };
        this.handleAuthorChange = this.handleAuthorChange.bind(this);
        this.handleTextChange = this.handleTextChange.bind(this);
    }
    handleAuthorChange(e) {
        this.setState({ author: e.target.value });
    }
    handleTextChange(e) {
        this.setState({ text: e.target.value });
    }
    render() {
        return (
            <form className="commentForm">
                <input
                    type="text"
                    placeholder="Your name"
                    value={this.state.author}
                    onChange={this.handleAuthorChange}
                />
                <input
                    type="text"
                    placeholder="Say something..."
                    value={this.state.text}
                    onChange={this.handleTextChange}
                />
                <input type="submit" value="Post" />
            </form>
        );
    }
}
Events #
React attaches event handlers to components using a camelCase naming convention. We attach onChange handlers to the two <input> elements. Now, as the user enters text into the <input> fields, the attached onChange callbacks are fired and the state of the component is modified. Subsequently, the rendered value of the input element will be updated to reflect the current component state.
You'll notice that we are explicitly binding our event handlers to this in the constructor. While older techniques, like React.createClass(...), featured automatic binding, we are using ES6 classes to define our components. React components declared as ES6 classes don't automatically bind this to the instance, so we have to explicitly use .bind(this).
For components with many event handlers, this explicit binding approach can get tedious. It's also easy to forget to declare your bindings which can cause some baffling bugs. React does offer two other techniques for ensuring your event handlers are bound properly to your component. Check out the Handling Events documentation on the React website for more information.
Submitting the form #
Let's make the form interactive. When the user submits the form, we should clear it, submit a request to the server, and refresh the list of comments. To start, let's listen for the form's submit event and clear it.
class CommentForm extends React.Component {
    constructor(props) {
        super(props);
        this.state = { author: '', text: '' };
        this.handleAuthorChange = this.handleAuthorChange.bind(this);
        this.handleTextChange = this.handleTextChange.bind(this);
        this.handleSubmit = this.handleSubmit.bind(this);
    }
    handleAuthorChange(e) {
        this.setState({ author: e.target.value });
    }
    handleTextChange(e) {
        this.setState({ text: e.target.value });
    }
    handleSubmit(e) {
        e.preventDefault();
        const author = this.state.author.trim();
        const text = this.state.text.trim();
        if (!text || !author) {
            return;
        }
        // TODO: send request to the server
        this.setState({ author: '', text: '' });
    }
    render() {
        return (
            <form className="commentForm" onSubmit={this.handleSubmit}>
                <input
                    type="text"
                    placeholder="Your name"
                    value={this.state.author}
                    onChange={this.handleAuthorChange}
                />
                <input
                    type="text"
                    placeholder="Say something..."
                    value={this.state.text}
                    onChange={this.handleTextChange}
                />
                <input type="submit" value="Post" />
            </form>
        );
    }
}
We attach an onSubmit handler to the form that clears the form fields when the form is submitted with valid input. We call preventDefault() on the event to prevent the browser's default action of submitting the form.
Callbacks as props #
When a user submits a comment, we will need to refresh the list of comments to include the new one. It makes sense to do all of this logic in CommentBox since CommentBox owns the state that represents the list of comments.
We need to pass data from the child component back up to its parent. We do this in our parent's render method by passing a new callback (handleCommentSubmit) into the child, binding it to the child's onCommentSubmit event. Whenever the event is triggered, the callback will be invoked:
class CommentBox extends React.Component {
    constructor(props) {
        super(props);
        this.state = { data: [] };
        this.handleCommentSubmit = this.handleCommentSubmit.bind(this);
    }
    loadCommentsFromServer() {
        const xhr = new XMLHttpRequest();
        xhr.open('get', this.props.url, true);
        xhr.onload = () => {
            const data = JSON.parse(xhr.responseText);
            this.setState({ data: data });
        };
        xhr.send();
    }
    handleCommentSubmit(comment) {
        // TODO: submit to the server and refresh the list
    }
    componentDidMount() {
        this.loadCommentsFromServer();
        window.setInterval(
            () => this.loadCommentsFromServer(),
            this.props.pollInterval,
        );
    }
    render() {
        return (
            <div className="commentBox">
                <h1>Comments</h1>
                <CommentList data={this.state.data} />
                <CommentForm onCommentSubmit={this.handleCommentSubmit} />
            </div>
        );
    }
}
Now that CommentBox has made the callback available to CommentForm via the onCommentSubmit prop, the CommentForm can call the callback when the user submits the form:
class CommentForm extends React.Component {
    constructor(props) {
        super(props);
        this.state = { author: '', text: '' };
        this.handleAuthorChange = this.handleAuthorChange.bind(this);
        this.handleTextChange = this.handleTextChange.bind(this);
        this.handleSubmit = this.handleSubmit.bind(this);
    }
    handleAuthorChange(e) {
        this.setState({ author: e.target.value });
    }
    handleTextChange(e) {
        this.setState({ text: e.target.value });
    }
    handleSubmit(e) {
        e.preventDefault();
        const author = this.state.author.trim();
        const text = this.state.text.trim();
        if (!text || !author) {
            return;
        }
        this.props.onCommentSubmit({ author: author, text: text });
        this.setState({ author: '', text: '' });
    }
    render() {
        return (
            <form className="commentForm" onSubmit={this.handleSubmit}>
                <input
                    type="text"
                    placeholder="Your name"
                    value={this.state.author}
                    onChange={this.handleAuthorChange}
                />
                <input
                    type="text"
                    placeholder="Say something..."
                    value={this.state.text}
                    onChange={this.handleTextChange}
                />
                <input type="submit" value="Post" />
            </form>
        );
    }
}
Now that the callbacks are in place, all we have to do is submit to the server and refresh the list:
class CommentBox extends React.Component {
    constructor(props) {
        super(props);
        this.state = { data: [] };
        this.handleCommentSubmit = this.handleCommentSubmit.bind(this);
    }
    loadCommentsFromServer() {
        const xhr = new XMLHttpRequest();
        xhr.open('get', this.props.url, true);
        xhr.onload = () => {
            const data = JSON.parse(xhr.responseText);
            this.setState({ data: data });
        };
        xhr.send();
    }
    handleCommentSubmit(comment) {
        const data = new FormData();
        data.append('Author', comment.author);
        data.append('Text', comment.text);

        const xhr = new XMLHttpRequest();
        xhr.open('post', this.props.submitUrl, true);
        xhr.onload = () => this.loadCommentsFromServer();
        xhr.send(data);
    }
    componentDidMount() {
        this.loadCommentsFromServer();
        window.setInterval(
            () => this.loadCommentsFromServer(),
            this.props.pollInterval,
        );
    }
    render() {
        return (
            <div className="commentBox">
                <h1>Comments</h1>
                <CommentList data={this.state.data} />
                <CommentForm onCommentSubmit={this.handleCommentSubmit} />
            </div>
        );
    }
}

ReactDOM.render(
    <CommentBox
        url="/comments"
        submitUrl="/comments/new"
        pollInterval={2000}
    />,
    document.getElementById('content'),
);
Congrats! #
You have just built a comment box in a few simple steps. The below tweaks are not absolutely necessary, but they will improve the performance and polish of your application, so we suggest reading through them. :)
We hope you have enjoyed learning about React and how ReactJS.NET allows you to easily use it from an ASP.NET MVC web application. Learn more about React from the project homepage and how to think about React components, or dive into the API reference and start hacking!
Continue on for more awesomeness!
Optimization: optimistic updates #
Our application is now feature complete but it feels slow to have to wait for the request to complete before your comment appears in the list. We can optimistically add this comment to the list to make the app feel faster.
class CommentBox extends React.Component {
    constructor(props) {
        super(props);
        this.state = { data: [] };
        this.handleCommentSubmit = this.handleCommentSubmit.bind(this);
    }
    loadCommentsFromServer() {
        const xhr = new XMLHttpRequest();
        xhr.open('get', this.props.url, true);
        xhr.onload = () => {
            const data = JSON.parse(xhr.responseText);
            this.setState({ data: data });
        };
        xhr.send();
    }
    handleCommentSubmit(comment) {
        const comments = this.state.data;
        // Optimistically set an id on the new comment. It will be replaced by an
        // id generated by the server. In a production application you would likely
        // use a more robust system for ID generation.
        comment.id = comments.length + 1;
        const newComments = comments.concat([comment]);
        this.setState({ data: newComments });

        const data = new FormData();
        data.append('Author', comment.author);
        data.append('Text', comment.text);

        const xhr = new XMLHttpRequest();
        xhr.open('post', this.props.submitUrl, true);
        xhr.onload = () => this.loadCommentsFromServer();
        xhr.send(data);
    }
    componentDidMount() {
        this.loadCommentsFromServer();
        window.setInterval(
            () => this.loadCommentsFromServer(),
            this.props.pollInterval,
        );
    }
    render() {
        return (
            <div className="commentBox">
                <h1>Comments</h1>
                <CommentList data={this.state.data} />
                <CommentForm onCommentSubmit={this.handleCommentSubmit} />
            </div>
        );
    }
}
Optimization: Bundling and minification #
Bundling refers to the practice of combining multiple JavaScript files into a single large file to reduce the number of HTTP requests to load a page. Minification refers to the removal of comments and unnecessary whitespace from JavaScript files to make them smaller. Together, bundling and minification can help to significantly improve the performance of your website.
There used to be a section on bundling and minification in this tutorial, but unfortunately the latest library being used by ASP.NET Core MVC (BundlerMinifier) is not easily extensible, which makes it difficult to add JSX processing to it. For production use, it is currently recommended to use a tool like Gulp or Webpack to bundle and minify your JavaScript.
Optimization: Server-side rendering #
Server-side rendering means that your application initially renders the components on the server-side, rather than fetching data from the server and rendering using the client. Server-side rendering enhances the performance of your application since the user will see the initial state immediately.
We need to make some modifications to CommentBox to support server-side rendering. Firstly, we need to accept an initialData prop, which will be used to set the initial state of the component, rather than doing an AJAX request. We also need to remove the initial loadCommentsFromServer call from componentDidMount, since it is no longer required.
class CommentBox extends React.Component {
    constructor(props) {
        super(props);
        this.state = { data: this.props.initialData };
        this.handleCommentSubmit = this.handleCommentSubmit.bind(this);
    }
    loadCommentsFromServer() {
        const xhr = new XMLHttpRequest();
        xhr.open('get', this.props.url, true);
        xhr.onload = () => {
            const data = JSON.parse(xhr.responseText);
            this.setState({ data: data });
        };
        xhr.send();
    }
    handleCommentSubmit(comment) {
        const comments = this.state.data;
        comment.Id = comments.length + 1;
        const newComments = comments.concat([comment]);
        this.setState({ data: newComments });

        const data = new FormData();
        data.append('Author', comment.Author);
        data.append('Text', comment.Text);

        const xhr = new XMLHttpRequest();
        xhr.open('post', this.props.submitUrl, true);
        xhr.onload = () => this.loadCommentsFromServer();
        xhr.send(data);
    }
    componentDidMount() {
        window.setInterval(
            () => this.loadCommentsFromServer(),
            this.props.pollInterval,
        );
    }
    render() {
        return (
            <div className="commentBox">
                <h1>Comments</h1>
                <CommentList data={this.state.data} />
                <CommentForm onCommentSubmit={this.handleCommentSubmit} />
            </div>
        );
    }
}
Also, we need to remove the ReactDOM.render call from the JSX file, as server-side rendering automatically outputs the correct ReactDOM.render call for you.
// ReactDOM.render(
//     <CommentBox
//         url="/comments"
//         submitUrl="/comments/new"
//         pollInterval={2000}
//     />,
//     document.getElementById('content')
// );
We need to update the Comment component to use Remarkable from either global or window, due to a bug in Remarkable. A utility function was provided earlier in the tutorial.
class Comment extends React.Component {
    rawMarkup() {
        const md = createRemarkable();
        const rawMarkup = md.render(this.props.children.toString());
        return { __html: rawMarkup };
    }
In the view, we will accept the list of comments as the model, and use Html.React to render the component. This will replace the ReactDOM.render call that currently exists in Tutorial.jsx. All the props from the current ReactDOM.render call should be moved here, and the ReactDOM.render call should be deleted.
@model IEnumerable<ReactDemo.Models.CommentModel>
@{
    Layout = null;
}
<html>
<head>
    <title>Hello React</title>
</head>
<body>
    @Html.React("CommentBox", new
    {
        initialData = Model,
        url = Url.Action("Comments"),
        submitUrl = Url.Action("AddComment"),
        pollInterval = 2000,
    })
    <script crossorigin src="https://cdnjs.cloudflare.com/ajax/libs/react/16.13.0/umd/react.development.js"></script>
    <script crossorigin src="https://cdnjs.cloudflare.com/ajax/libs/react-dom/16.13.0/umd/react-dom.development.js"></script>
    <script src="https://cdnjs.cloudflare.com/ajax/libs/remarkable/1.7.1/remarkable.min.js"></script>
    <script src="@Url.Content("~/js/tutorial.jsx")"></script>
    @Html.ReactInitJavaScript()
</body>
</html>
We need to modify the controller action to pass the data to the view:
public ActionResult Index()
{
    return View(_comments);
}
We also need to modify Startup.cs to tell ReactJS.NET which JavaScript files it requires for the server-side rendering:
// Initialise ReactJS.NET. Must be before static files.
app.UseReact(config =>
{
    config
        .AddScript("~/js/remarkable.min.js")
        .AddScript("~/js/tutorial.jsx");
});
Note that we need a copy of Remarkable in order to load it for server-side rendering. In a production app you'd probably use Bower or npm for this, but for our tutorial you can download the file from CDNJS and save it into ~/js.
That's it! Now if you build and refresh your application, you should notice that the comments box is rendered immediately rather than having a slight delay. If you view the source of the page, you will see the initial comments directly in the HTML itself:
<html>
<head>
  <title>Hello React</title>
</head>
<body>
  <div id="react_0HLTCOER4L8KP">
    <div class="commentBox" data-reactroot="">Comments</h1>
      <div class="commentList">
        <div class="comment">
          <h2 class="commentAuthor">Daniel Lo Nigro</h2>
          <span><p>Hello ReactJS.NET World!</p></span>
        </div>

    <!-- Rest of the contents ommitted for brevity -->